Teacher Gifts
So, what do you do when your 2 kids have 4 teachers!?! Ashley only has one teacher, but Eden has 3 at her preschool that teach her everyday. I know I can't complain, my sister has 4 kids either in school or preschool. It just seemed like it would be more money than I wanted to spend on teacher gifts this year.
Normally I'd buy something typical, like a large candle or a fleece blanket, or a bunch of flowers for each teacher. This year, I wanted to do things cheaper, but still have a nice gift to give. So I looked around online and found these!

Normally I'd buy something typical, like a large candle or a fleece blanket, or a bunch of flowers for each teacher. This year, I wanted to do things cheaper, but still have a nice gift to give. So I looked around online and found these!

This is where I got my idea, but I improvised a bit. This is just one of the many site I found these on, I just like the instructions on this site the best.
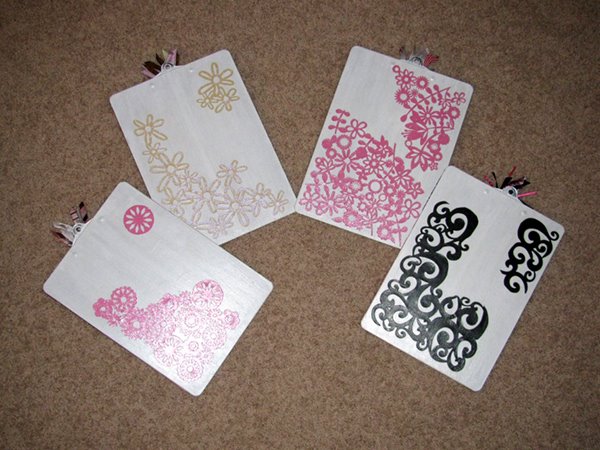
So I made these! There a more than 4 there, for a reason. I got an extra of the large clipboards just in case I messed up the first one. I also got a little one, just in case I needed a bit more practice before doing them for the teachers.
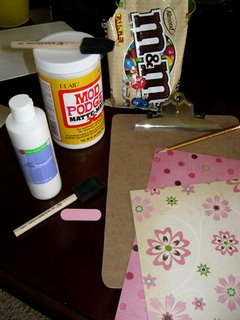
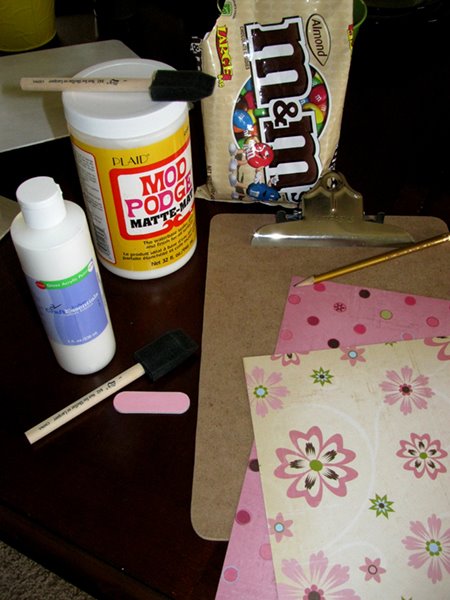
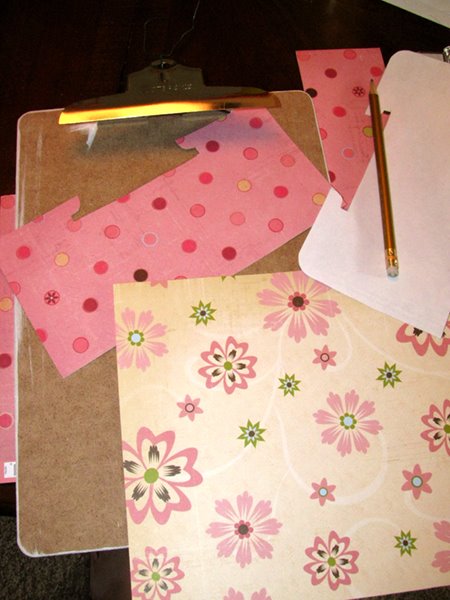
What you'll need is the clipboard, Mod Podge (amazing stuff), several foam paint brushes (I used about 7 of them since the brush would harden while waiting for the glue the dry each time), pencil, paper for clipboard, scrap paper, scissors, a fingernail file, paint to match the paper, ribbon, and your favorite snack (mine is almond M&M's).
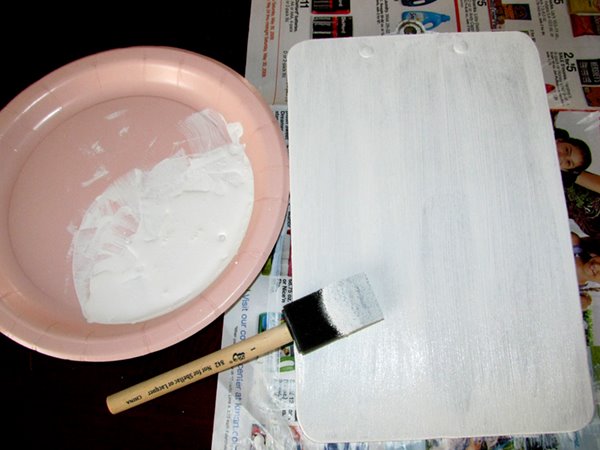
First, paint the back of the clipboard, I put 3 layers of paint on it since I was using light colored paint on a dark board. Also paint around the clip on the front.

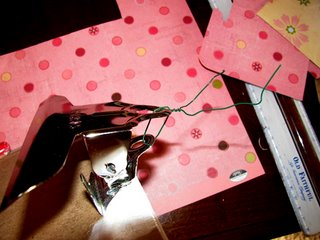
On all the sites I've looked at, no one said what to do with the clip while you wait for things to dry, so I used crafting/florist wire to hold it open.
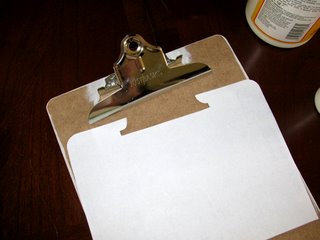
Next, using the scrap paper, make a template for the cutout around the clip on the front. That way, you can just trace it onto the nice paper. The reason I painted around the clip was so it didn't have to be exact.
Measure and cut out the paper. I had the bottom paper go about 2/3 to 3/4 of the way up.

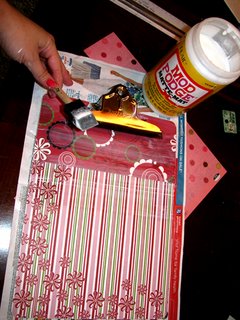
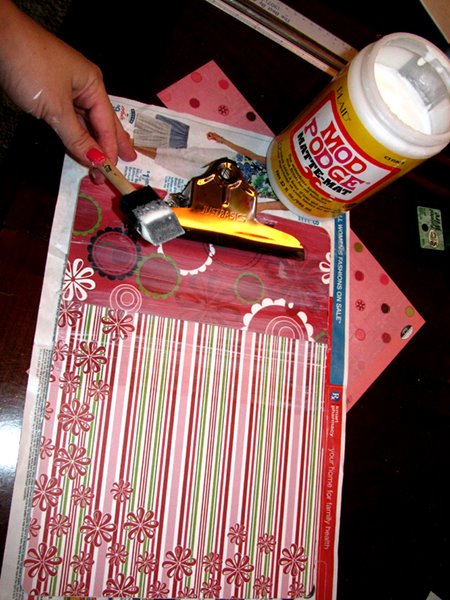
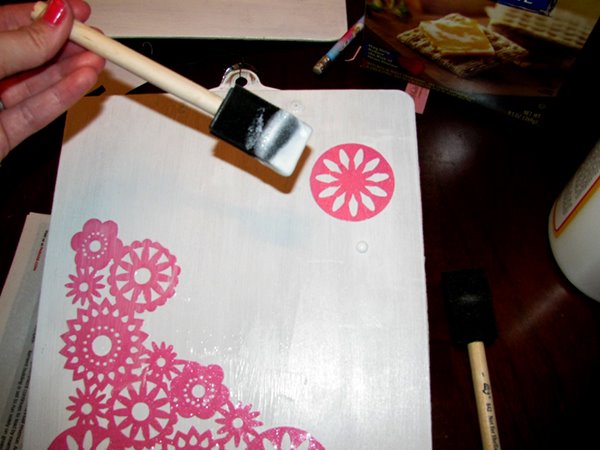
Then, using the Mod Podge and the foam brush, glue them on. I found, you don't have to be too careful with the glue since it dries clear.
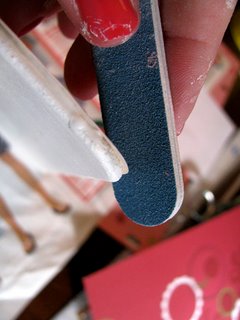
While the glue is still wet, use the file and get those edges of the paper filed down to the board! This helps the edges stay down.
Now, take the Mod Podge and put a nice layer of it right over the top of the paper! I ended up doing 3 coats on top sice I'm so paranoid about stuff. (Let it dry after each top coat.)
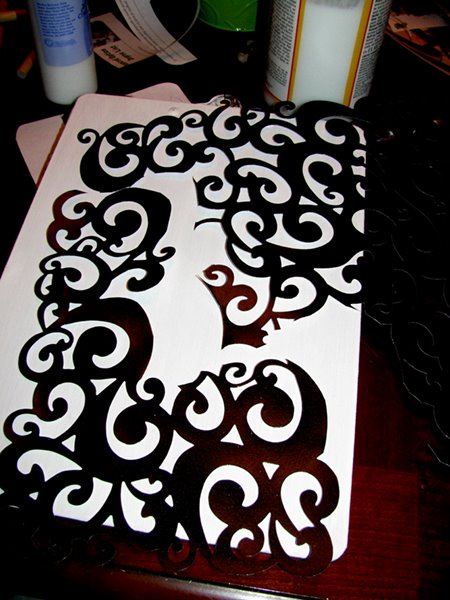
Now this part wasn't on any sites that I saw, and I wasn't planning on doing anything with the back till I saw this really cool paper at the store. So, I cut out what I wanted to put on the back!

Arrange it however you like and do the same thing as the front. Mod Podge it on and then do a layer or 2 over the top of it. Remeber to let it dry after each top coat.

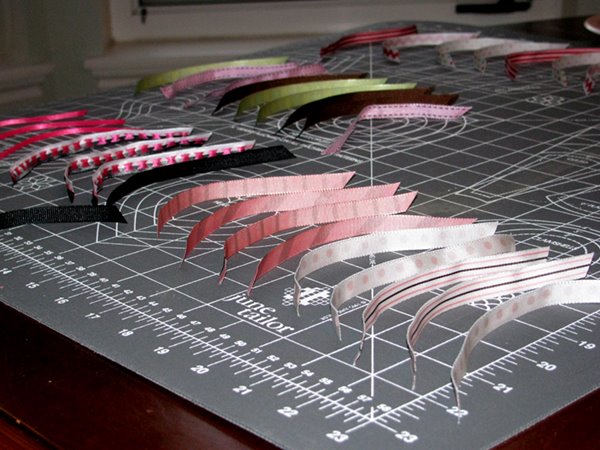
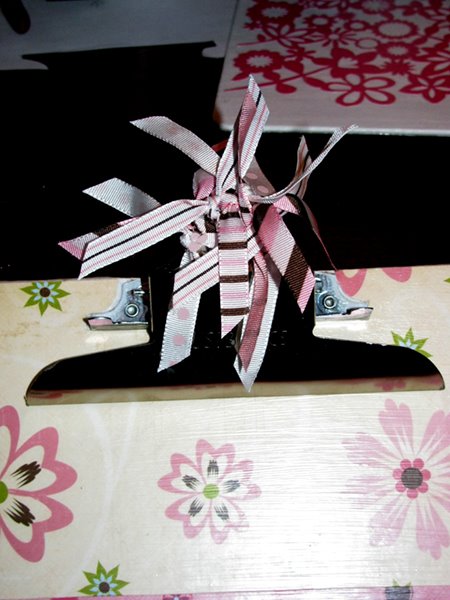
Now the ribbon. I cut mine about 5 inches long and then "Fray Check"ed the ends. Instead of ribbon, or along with the ribbon, you could glue a cute flower on the clip too. But I was keeping it cheap.

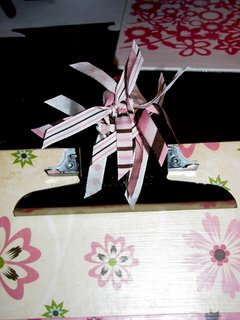
So, here they are again! Front and back! My favorite is the one with the girl on it, but I'm not keeping that one.


So do I throw all 4 teachers in a room and let them fight over who gets which? J/K!
So I made these! There a more than 4 there, for a reason. I got an extra of the large clipboards just in case I messed up the first one. I also got a little one, just in case I needed a bit more practice before doing them for the teachers.
What you'll need is the clipboard, Mod Podge (amazing stuff), several foam paint brushes (I used about 7 of them since the brush would harden while waiting for the glue the dry each time), pencil, paper for clipboard, scrap paper, scissors, a fingernail file, paint to match the paper, ribbon, and your favorite snack (mine is almond M&M's).
First, paint the back of the clipboard, I put 3 layers of paint on it since I was using light colored paint on a dark board. Also paint around the clip on the front.
On all the sites I've looked at, no one said what to do with the clip while you wait for things to dry, so I used crafting/florist wire to hold it open.

Next, using the scrap paper, make a template for the cutout around the clip on the front. That way, you can just trace it onto the nice paper. The reason I painted around the clip was so it didn't have to be exact.

Measure and cut out the paper. I had the bottom paper go about 2/3 to 3/4 of the way up.
Then, using the Mod Podge and the foam brush, glue them on. I found, you don't have to be too careful with the glue since it dries clear.
While the glue is still wet, use the file and get those edges of the paper filed down to the board! This helps the edges stay down.

Now, take the Mod Podge and put a nice layer of it right over the top of the paper! I ended up doing 3 coats on top sice I'm so paranoid about stuff. (Let it dry after each top coat.)
Now this part wasn't on any sites that I saw, and I wasn't planning on doing anything with the back till I saw this really cool paper at the store. So, I cut out what I wanted to put on the back!
Arrange it however you like and do the same thing as the front. Mod Podge it on and then do a layer or 2 over the top of it. Remeber to let it dry after each top coat.
Now the ribbon. I cut mine about 5 inches long and then "Fray Check"ed the ends. Instead of ribbon, or along with the ribbon, you could glue a cute flower on the clip too. But I was keeping it cheap.
So, here they are again! Front and back! My favorite is the one with the girl on it, but I'm not keeping that one.

So do I throw all 4 teachers in a room and let them fight over who gets which? J/K!
posted by Rachelle at
3:52 PM
![]()

4 Comments:
Awesome! They look great...I like the green and black leaf one the best. Great job!
These are adorable! I am so glad that I don't have to worry about teacher gifts yet! :)
Super cute, mrs crafty, but i'm still wondering what the m&m's were for? ha ha....
Those are so cute! I am going to try that this weekend! Those would be so cute to use in Young Womens when I have a sign up sheet or something! Good job!
Post a Comment
Subscribe to Post Comments [Atom]
<< Home